Managing data for financial instruments
From the Instrument Data Mart page in the Command Center, you can import data for financial instruments, populate and maintain data tables, perform Data Quality Analysis (DQA), and review validation reports.
The following table describes the tasks you can perform on each tab of this page.
| Tab | Description |
|---|---|
| Load Data | Import records for multiple types of financial instruments. |
| Staging and Analysis | Update the reference tables for specific types of financial instruments. |
| Manage Tables | Update the reference tables for specific types of financial instruments. |
| Process Data | Process profitability data. |
| View Reports | Review validation reports for stored data about financial instruments |
From the Load Data tab, you can import records for one or more types of financial instruments, such as certificates of deposit (CDs) or loans. Each row of the table under Import Instrument Records represents a type of financial instrument.
TIP: You can also select the import files to be loaded using the import settings selected on the Load Data tab of the System Administration page. For more information, see Loading system data.
The table on this page contains the following columns.
| Column | Description |
|---|---|
| [no heading] | A check box indicating whether each type of record is selected for import. |
| Description | A text description assigned to each import file. |
| Import table | The table associated with the type of financial instrument contained in the import files, such as loans, deposits, or credit cards. |
| Import utility | The utility associated with the import file in the Relationship Profitability and Pricing System (RPPS). |
| Start Period | The start date of the period for which to import data. |
| End Period | The end date of the period for which to import data. |
| Process | A button to initiate processing of each import. When no file is selected, the button is inactive. |
| Saved On | The most recent date when each type of import was processed. |
| Import status | A message indicating the status of the most recent import: In Progress, Unable to Process, or Completed. |
To import records for financial instruments:
-
From the Command Center, click Instrument Data Mart.
-
Click Load Data.
-
In the Import File column for each type of instrument data to be imported, select a file from the list.
-
In the Start Period column, click the calendar icon and select a start date from the calendar grid.
-
In the End Period column, click the calendar icon and select an end date from the calendar grid.
-
In the Process column for the selected file, click Process.
TIP: To process multiple imports, select the check box for each import, and then click Process Selection.
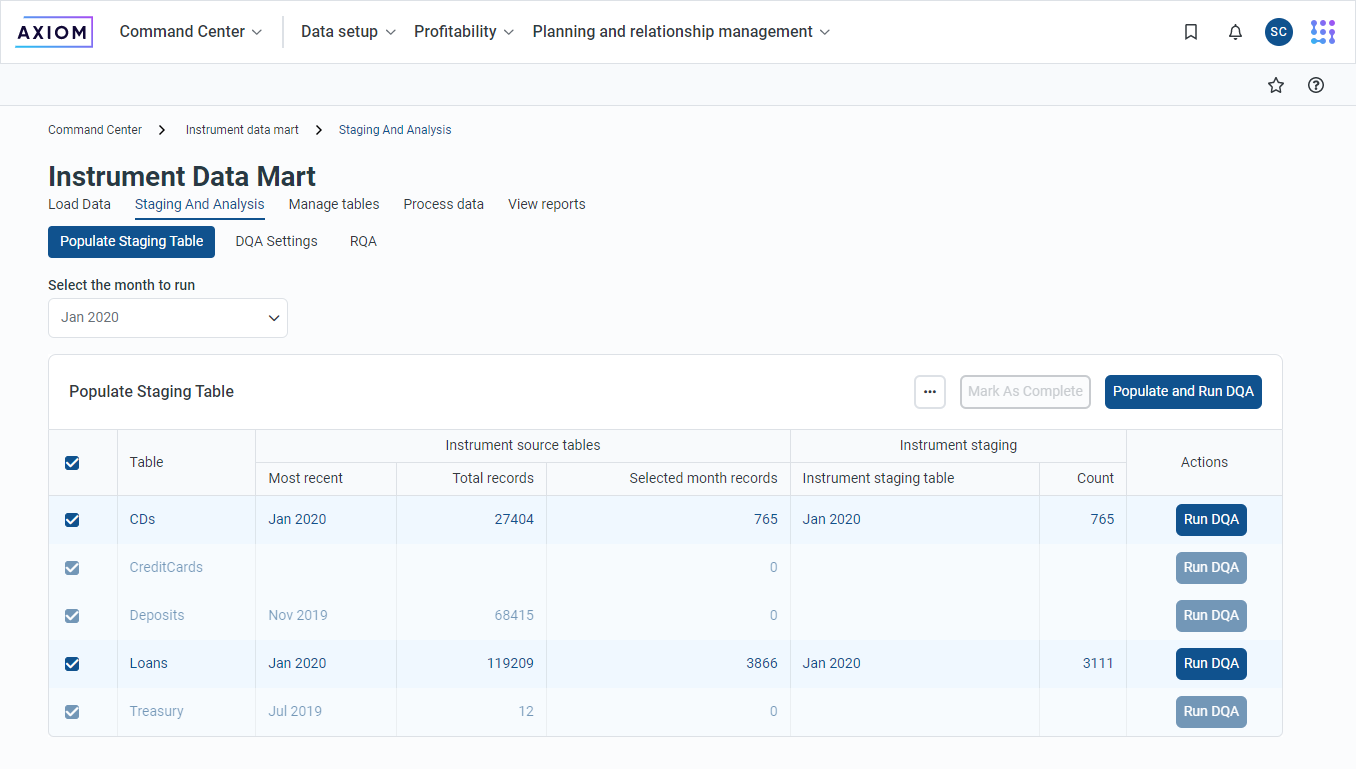
From the Staging and Analysis tab, you can copy financial instrument data to the staging table before processing Data Quality Analysis (DQA).
NOTE: The staging table is the source for processing Funds Transfer Pricing (FTP) and for the cash flow data generated for planning.
This tab includes the following sub-tabs:
-
Populate Staging Table
-
DQA Settings
TIP: For more information, see Instrument data staging and analysis.
From the Manage Tables tab, you can update the following reference tables for specific types of financial instruments:
-
Interest Index Map
-
Treasury Import Map
-
Product
-
Interest Index
-
Default Interest Index
Update Interest Index Map, Treasure Import Map, Product, and Interest Index tables
Update reference tables for financial instruments:
-
From the Command Center, click Instrument Data Mart.
-
Click Manage Tables.
-
Under Manage Instrument Reference Tables, click Open in the Action column for the table you want to update.
NOTE: The table opens in a separate browser tab.
-
Update the table as needed, using the following display and edit options.
-
To sort or filter the page by the content of any column in the table, click the down arrow to the right of the column heading and select any of the sorting or filtering options in the control panel, and then click Apply.
-
To add a blank row at the bottom of the table, click Add Row.
-
To add multiple rows:
-
Click Add Rows.
-
In the Add Rows dialog, click the arrows to select the number of rows to add.
-
Click OK.
-
-
To delete a row:
-
Select the row, and then click Delete Row.
-
In the Confirm Delete dialog, click OK.
-
-
To save all changes, click Save.
-
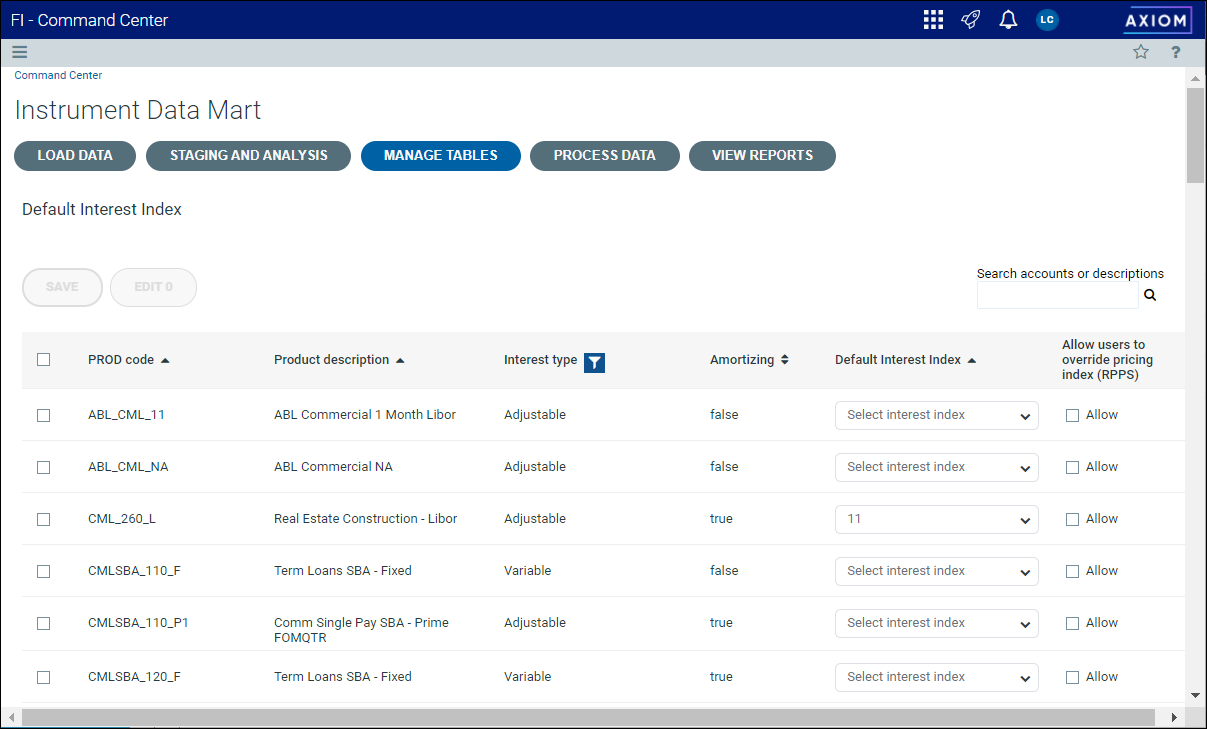
Update the Default Interest Index table
Use the Default Interest Index page to set up default interest indexes for your products. This process is different than the previous process for the other reference tables.
Update the default interest index for a single product:
- From the Command Center, click Instrument Data Mart.
- Click Manage Tables.
-
Under Manage Instrument Reference Tables, click Open in the Default interest index row.

Click to enlarge image
-
Select a new value in the Default Interest Index column for the product.
NOTE: You can filter products using the Filter icon
 in the Interest type column or search for products using the search box at the top of the page.
 - [Optional] Select the Allow users to override pricing index (RPPS) check box.
- Click Save.
- Click OKat the prompt.
Update the default interest index for multiple products:
-
From the Command Center, click Instrument Data Mart.
-
Click Manage Tables.
-
Under Manage Instrument Reference Tables, click Open in the Default Interest Index row.
TIP: Use the filter and search features to limit the number of products returned.
-
Select the check boxes for each product you want to update. You can select all products by selecting the check box in the header row.
-
Click Edit.
-
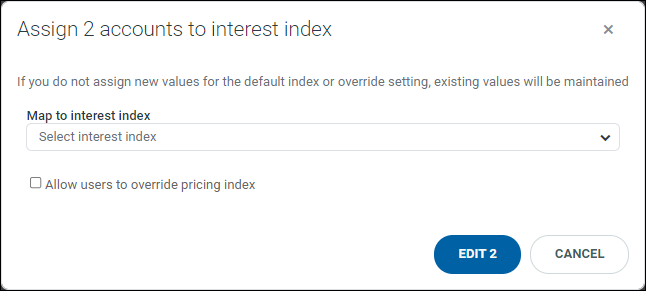
In the Editdialog box, select an interest index in the Map to interest index drop-down list. This index will apply to all products that you select.
Click to enlarge image
NOTE: If you do not select a default index in the Edit dialog, the current index is maintained.
-
Select or clear the Allow users to override pricing index (RPPS) check box.
-
Click Edit.
-
Click OKat the prompt.
Use the Process Data tab to process your capital allocations directly from the Instrument Data Mart page.
To process profitability data:
- From the Command Center, click Instrument Data Mart.
- Click Process Data.
-
Specify the period for which you want to process capital allocations in the Processing period field.
TIP: You can type a month and year in the MM YYYY field or click the calendar icon to select a month and year.
- Select the capital allocations you want to process in the Name column.
-
Click Process. The Process status column is updated when processing is complete. The following is a list of all statuses:
- Pending – Job has not been run.
- In progress – The job is running.
-
Completed – The job completed successfully.
-
Unable to process – The job cannot be started.
-
Completed with errors – The job completed with errors.
From the View Reports tab, you can review validation reports for stored data about financial instruments.
TIP: View each report after processing the Data Quality Analysis (DQA).
The following reports are currently available for viewing, along with any reports that may be added by the client organization.
| Report | Example |
|---|---|
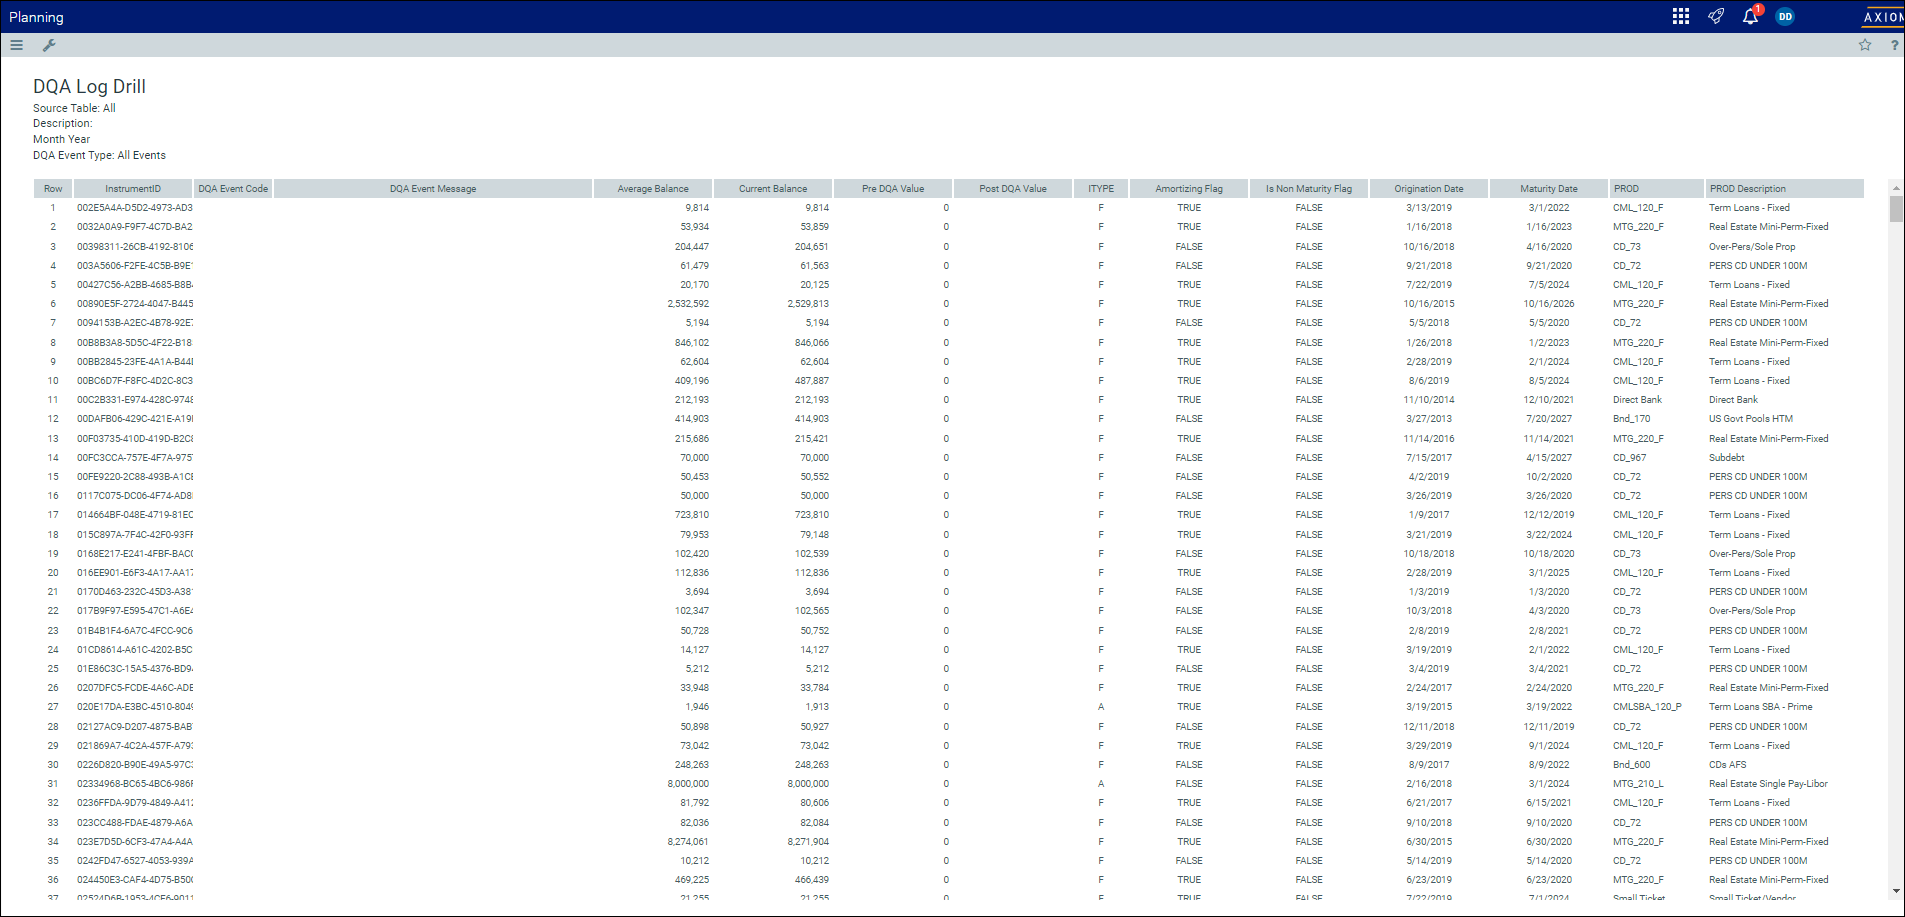
| DQA Log Drill - RPPS This report lists DQA log entries from Axiom RPPS. |
Click to enlarge image |
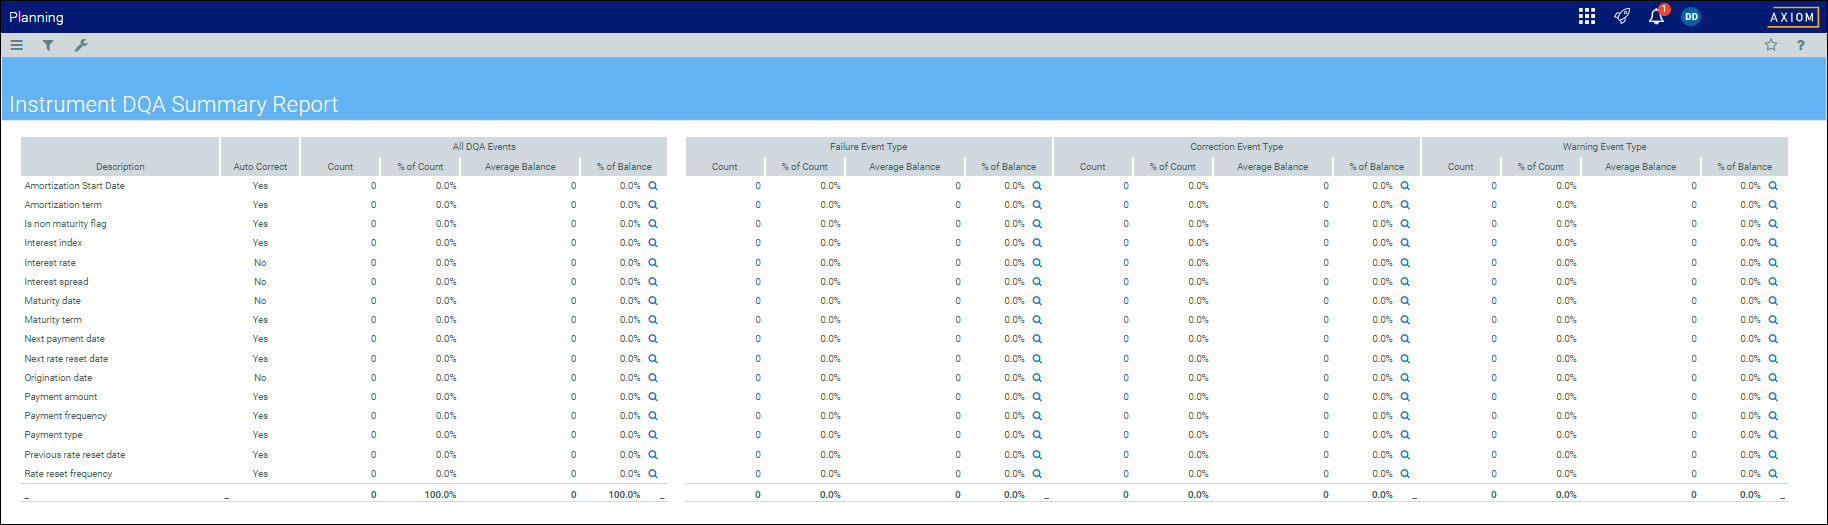
| Instrument DQA Summary Report - RPPS
This report summarizes DQA results by column and by DQA event code. Double-click any cell on the Report tab cells to drill down to the DQA results for each financial instrument. |
Click to enlarge image |
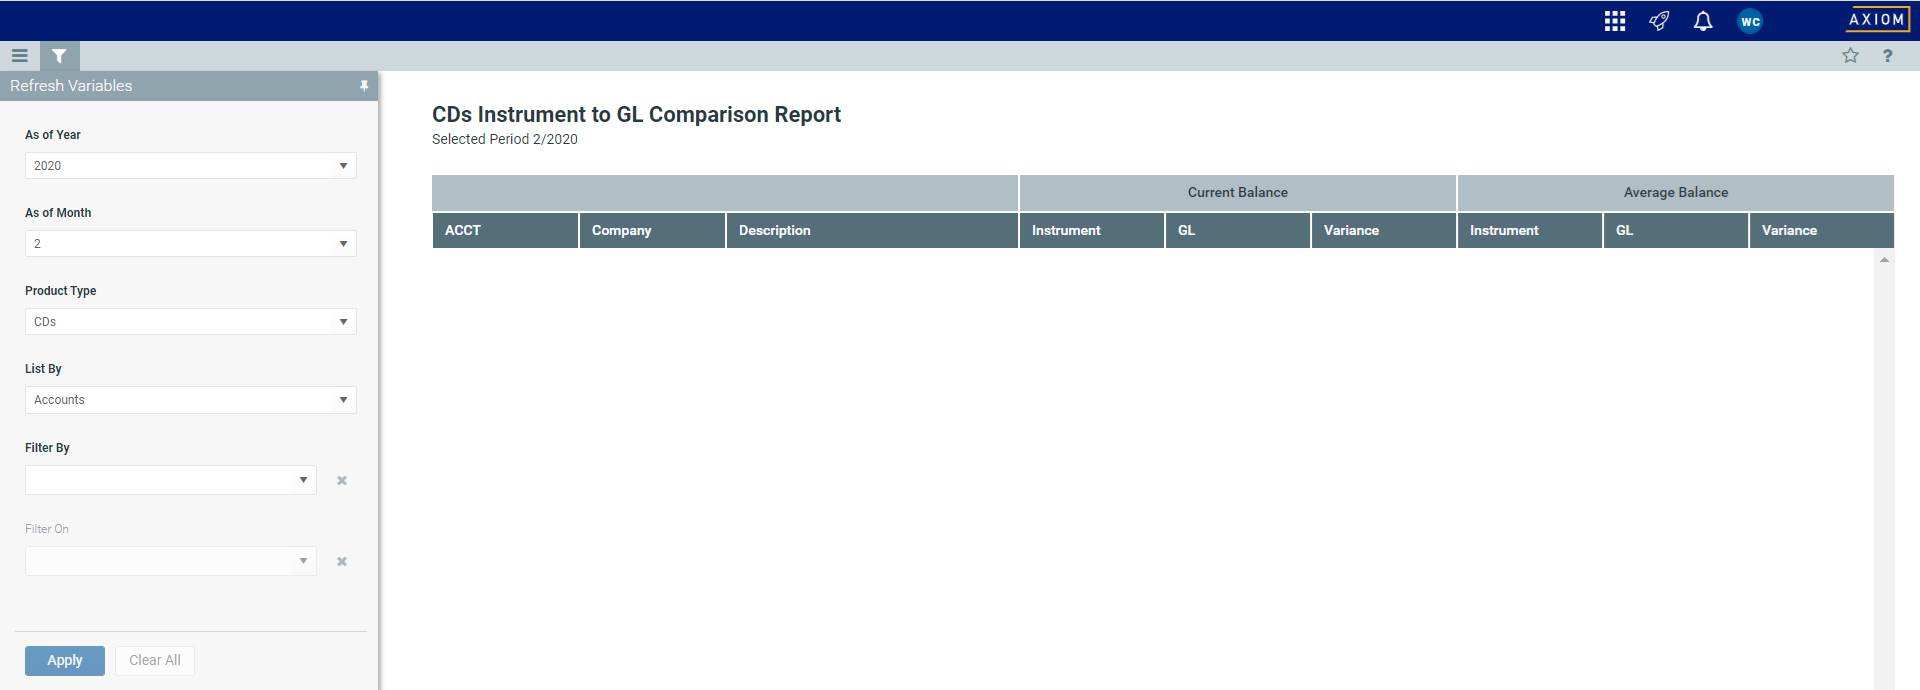
| Instrument Balance to GL Balance Comparison Report
This report compares the instrument balance to the General Ledger (GL) balance. NOTE: This report is viewable in both PDF files and Microsoft Excel spreadsheets. |
Click to enlarge image |
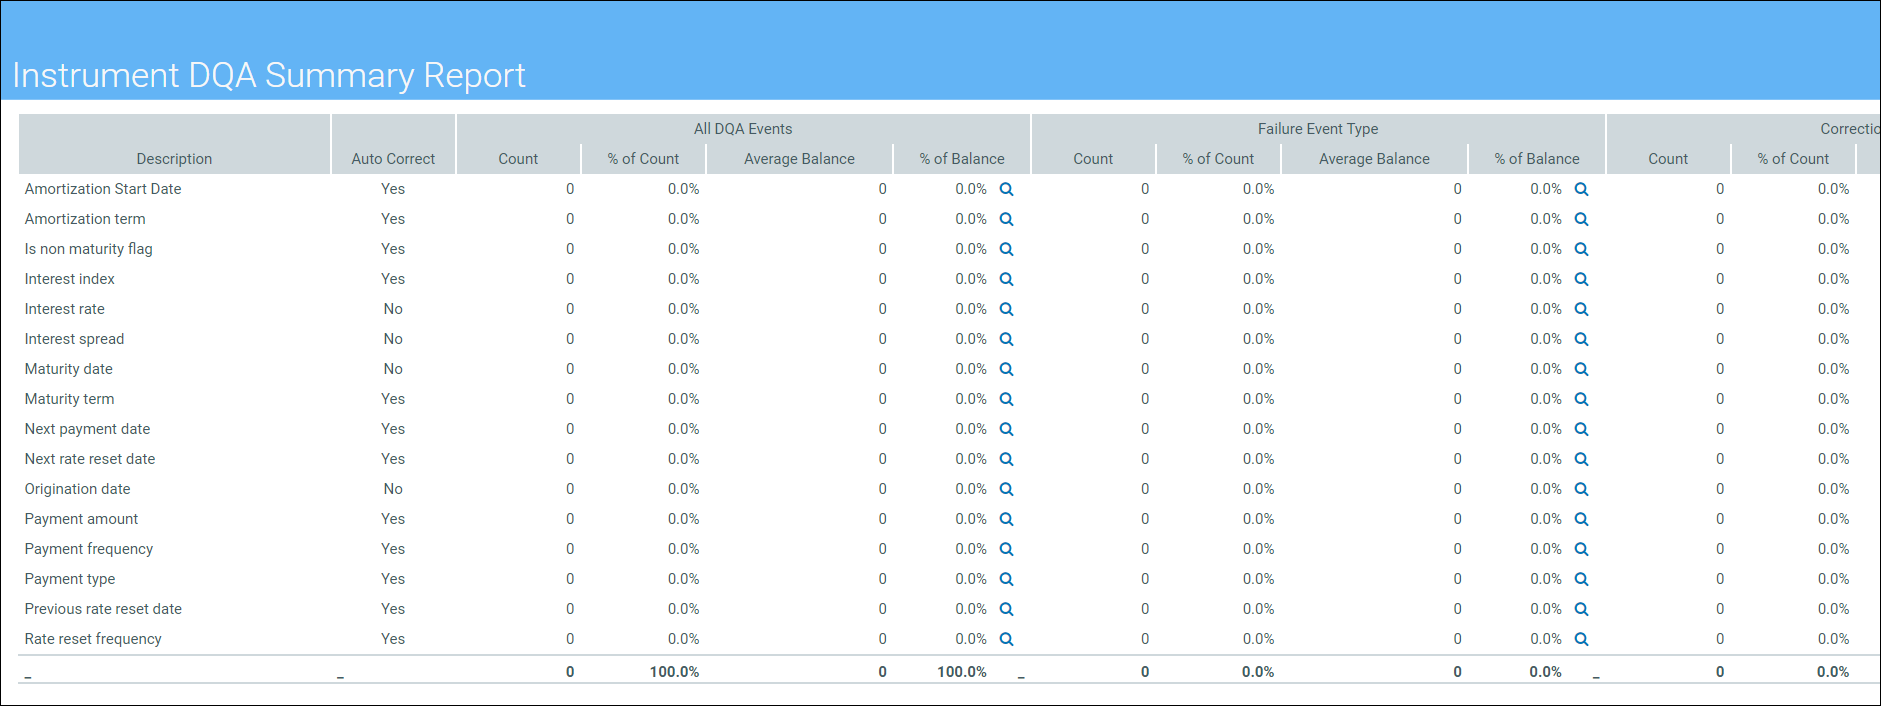
| Instrument DQA Summary Report
This report summarizes DQA results by column and by DQA event code. Double-click any cell on the Report tab to drill down to instrument data. TIP: You can select the prior report period to review that period. |
|
 Click to enlarge image
View validation reports for financial instrument data:
-
From the Command Center, click Instrument Data Mart.
-
Click View Reports.
-
Under View Validation Reports, in the Report Name column, click the report name to view the report.
TIP: The Format column indicates which reports are viewable as PDF files and which are viewable as Excel spreadsheets.
